
 Reserve with Google
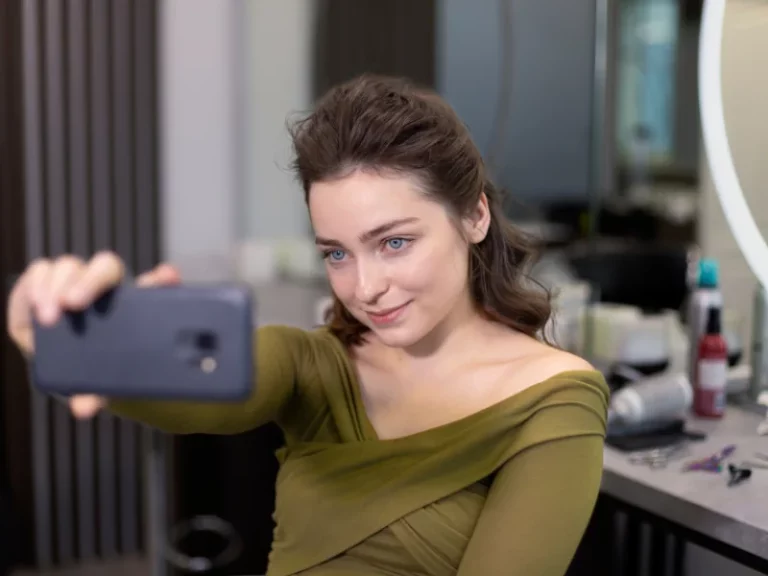

Digital Marketing & Multimedia Expert
Table of Contents
In the beauty industry, high-quality photography is an essential inclusion. As a beauty salon owner, or medspa operator, it’s a key part of how you showcase your work, establish your unique brand, and entice new clients. There’s always a place for professional shoots, but mastering some DIY techniques gives you the flexibility to create on-demand content that reflects your style – without constant extra expense.
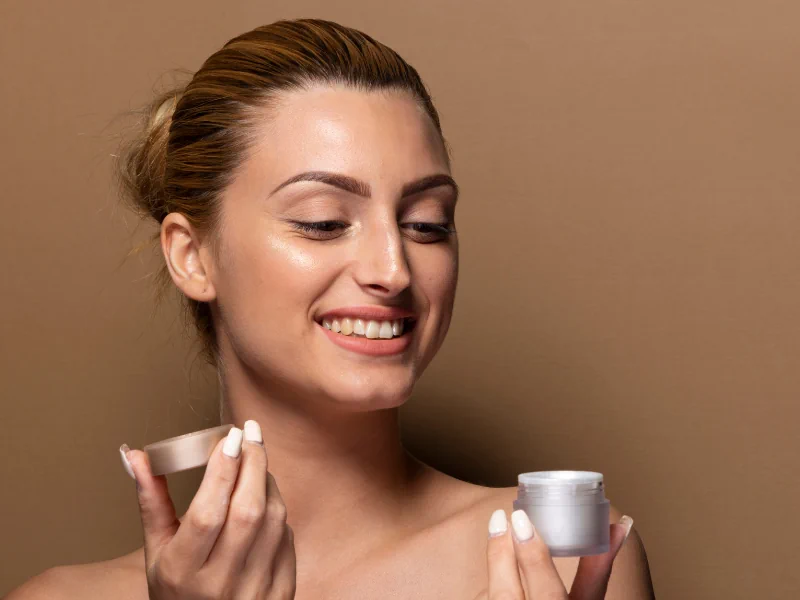
Beauty is all about expression. Being able to help tell the story of your clients beauty journey through photography is something every salon owner thinks about. Before/after photos, showing off a new treatment, introducing a new team member; you are probably doing some of these already.
We’ve put together a comprehensive photography guide for beauty salon & medspa owners to help turn your own visuals into reusable, cornerstone content for social, website, instore and promotional materials.
Why you should spend time on your salon’s photography
Branding:
Stepping away from stock photography is a big step to establishing an identifiable salon brand. Your brand is meant to reflect you as a beauty salon owner and having your own visuals feeds into that.
Credibility:
High-quality photos convey professionalism and build trust with potential clients. Stock photography can be helpful to fill-in where it can, but being able to reflect what a potential client can expect in a visit to your salon is really important.
Marketing:
Unique visuals are essential for effective marketing campaigns and driving social media interaction.
Cost Savings:
Reduce reliance on professional shoots for everyday content needs, saving money in the long run.
Immediacy:
Create on-demand visuals for last-minute promotions, events, or client transformations. Even being able to capture candid moments for Tiktok or Insta Reels.
Creative Control:
Experiment and develop a unique visual style for your beauty salon that sets you apart from the competition.
Be the stylist and photographer:
Be in a position to offer an all-in one treatment + photoshoot experience!
Alright! Now that we’ve got the whys, let’s start on the how’s. Beginning with a most fundamental element of photography, lighting.
The power of 100% organic, natural light
Natural light is your best friend for flattering, budget-friendly salon photography. You can achieve great looking images without a full on studio lighting setup.
Leveraging windows
Position your client stations near large windows, ideally with northern exposure for consistent, diffused light. Southern windows can create harsh midday light, while other directions might be shaded at certain times.
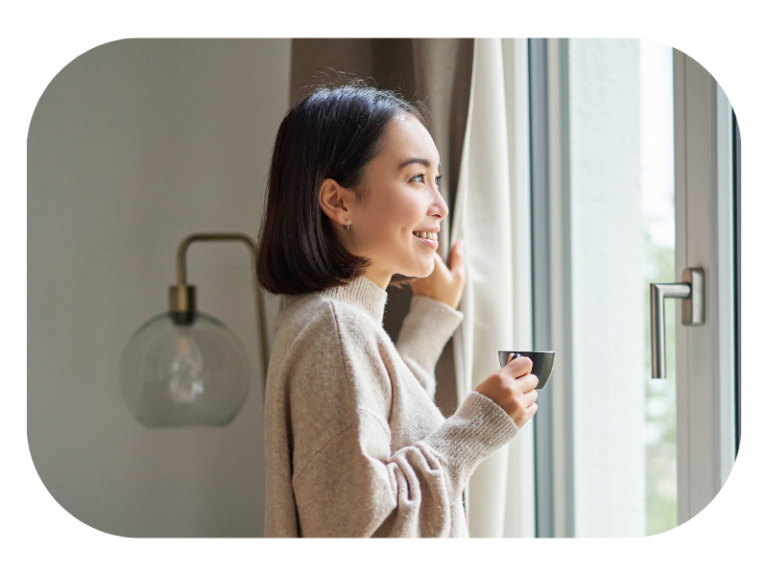
Facing the light
For before/after photos, have your client face the window. This illuminates their face and hair evenly, avoiding unflattering shadows. If the light is too strong, experiment with them slightly off-center
Time it right
Early morning and late afternoon usually offer the softest natural light. However, the exact timing depends on your window orientation – take test shots throughout the day to discover the sweet spots in your salon.

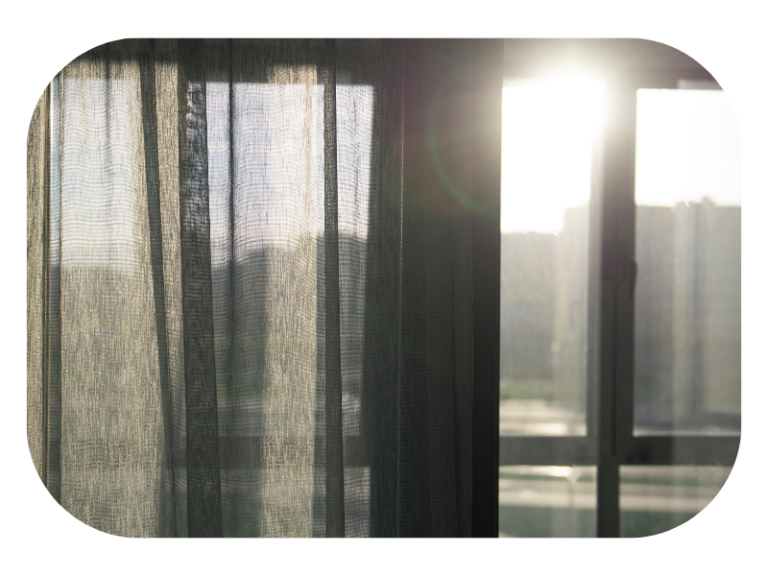
DIY diffusion
If the light is a bit too harsh, hang a sheer white curtain or sheet over the window to soften it (don’t worry we’ll talk about light diffusion later in detail!)
Clouds are friends
Overcast skies create naturally diffused light, perfect for even, shadow-free photos.

📸 Smartphone settings matter!
Even with perfect natural light, your phone’s camera needs adjusting. Turn off the flash (it will ruin the shot). Most phone cameras have a simple “exposure” slider – try brightening it slightly for salon photos. Experiment to find what looks best! If you are a real expert, there should be a ‘Pro’ mode on your camera too, where you get really in the weeds with settings.
💡Advanced techniques: Making light work of light manipulation
If one side of the subject is slightly shadowed, use a white poster board or even a piece of aluminum foil to subtly reflect light back onto those areas.
DIY photography composition - the foundation of looking good
Before we start talking about tools, gadgets, and other purchases, we should go over the basics of photography composition for your beauty salon. You could buy the most expensive, highest end facial creams, or latest microneedling machine, but an esthetician needs to know how to use them to get the most out of them.
You might notice that the in-Salon examples we give all reference one another. This is intentional: composition is a holistic practice where each element can work together in creating distinctive images!
Framing
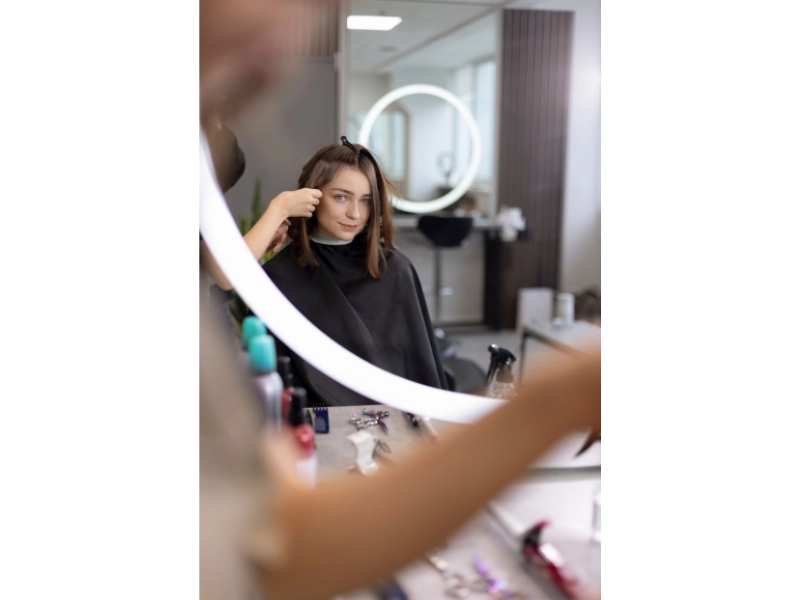
Using existing elements within your beauty salon’s environment to create a natural “frame” around your subject adds depth and guides the viewer’s eye. Frames don’t have to be rectangular. Look for doorways, archways, mirrors, or even strategically placed styling tools.
Framing can be used in conjunction with leading lines and other techniques (which we briefly go over below) for even more compelling images.
Quick in-Salon examples you can use:
- Position the camera to capture the client’s face framed within a salon mirror.
- Place a featured product on a countertop, framed by decorative elements or blurred-out shapes in the background.
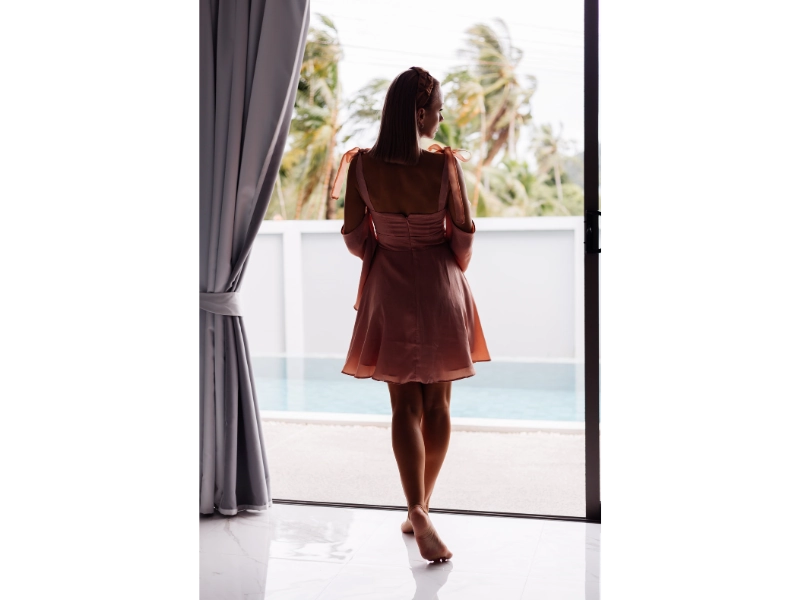
- Capture a client leaving the salon with a beautiful new hairstyle, framed by the open doorway for a sense of movement.
Rule of Thirds
Not a rule, not something you absolutely have to follow, more of a best practice. The rule of thirds helps create visually pleasing images by placing your subject off-center, along an imaginary grid dividing your photo. This creates a sense of balance and interest.
By using the rule of thirds, you’ll be able to better frame (like we discussed above) a subject to create interesting, eye-catching salon images.
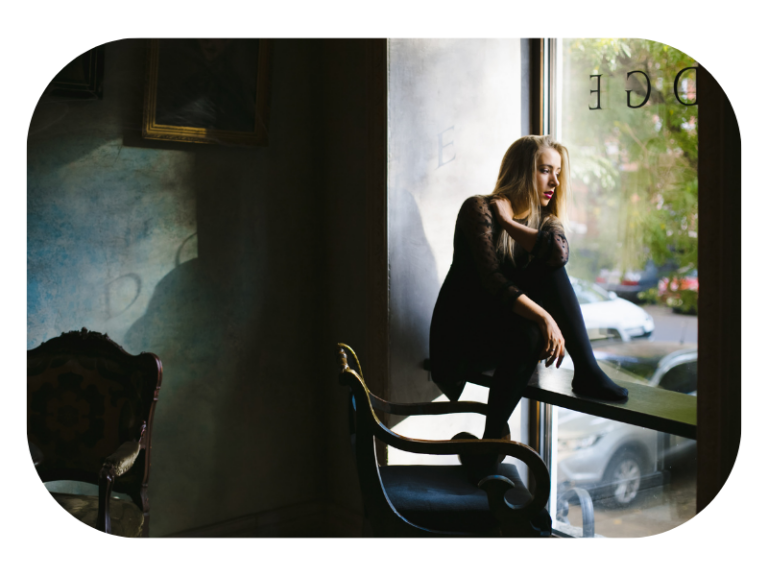
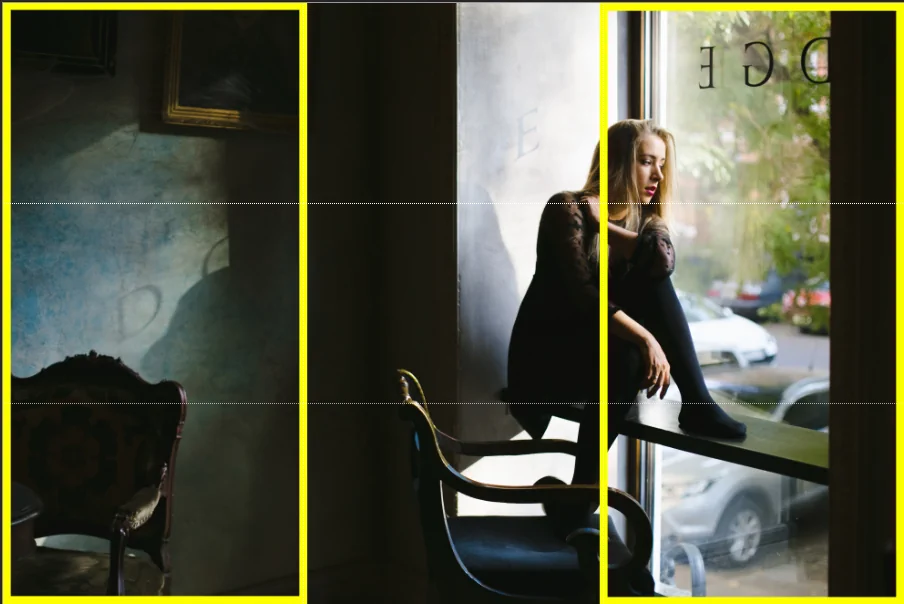
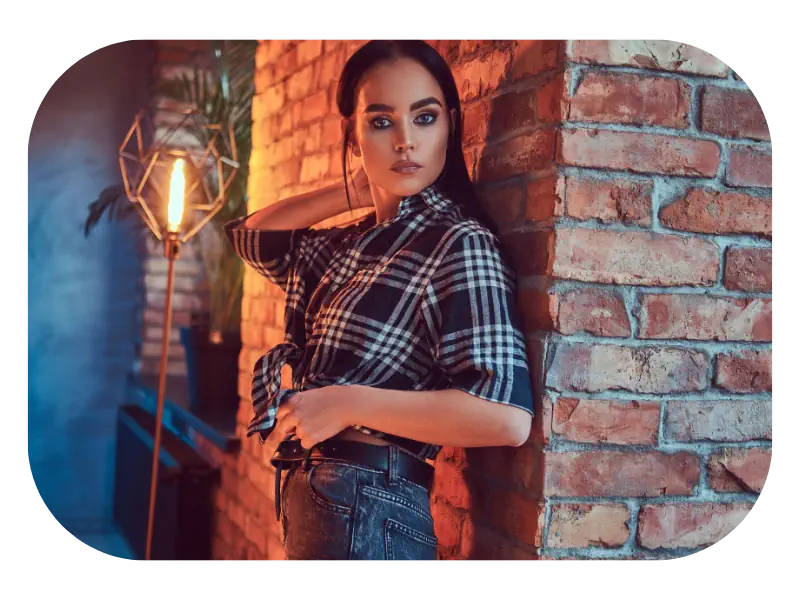
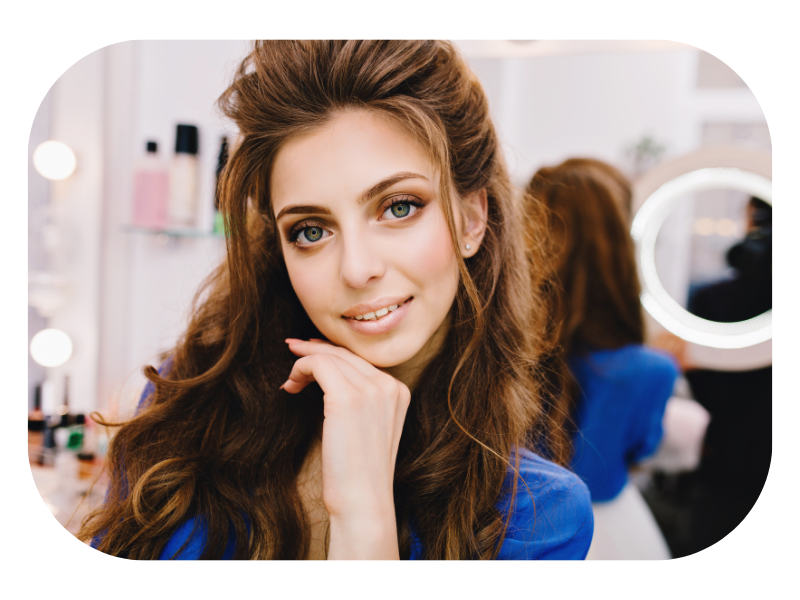
You can see an example of a photo we used earlier in this blog:
– The model, view from the window to the outside, and light source are all positioned on the right hand side of the image, with the model herself intersecting the middle and right hand side.
– The light against the wall, the picture hanging on the wall, and the other chair are all situated on the left hand of the image.
– The center is largely clear of interesting elements, and has the least amount of light in it.
Turn on the Grid
Most phones will have a setting to turn on a ‘grid’ (my phone calls it an ‘assistive grid’) that will overlay three horizontal & vertical lines. These correspond to the rule of thirds.
Get on the Grid
Those intersections are considered ‘power points’ in photography. Placing your subject along those lines or where they intersect creates a more balanced and interesting composition than simply centering everything
People plus products
Apply the rule of thirds to product flat lays, shots of your salon decor, or any subject where you want a harmonious look.
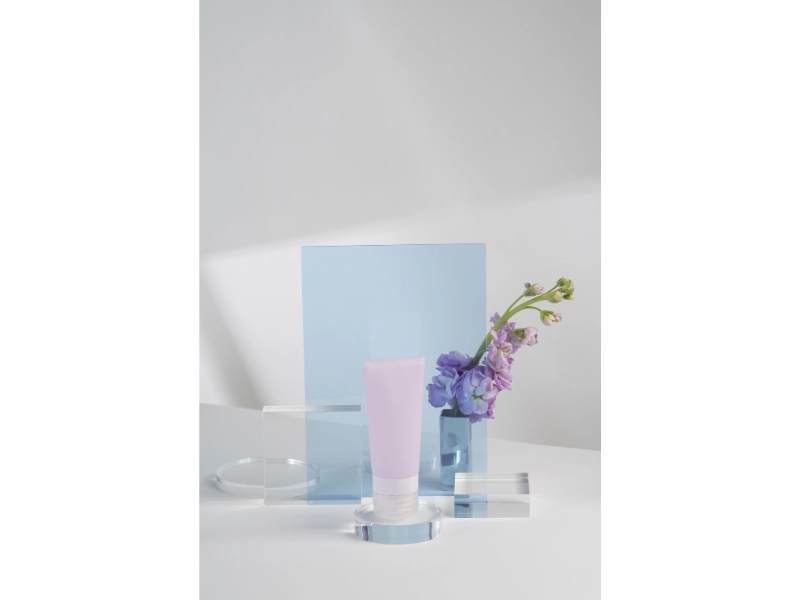
Negative Space
Negative space is an essential component of a minimalist style. Minimalism is often associated with clean, professional, and upscale salons, although again that is not a hard rule.
From a resources point of view, minimalism is in theory easier to achieve, as it requires less stuff. A lot of the photography backdrops and lighting we talk about later in the guide is geared towards a minimalist style.
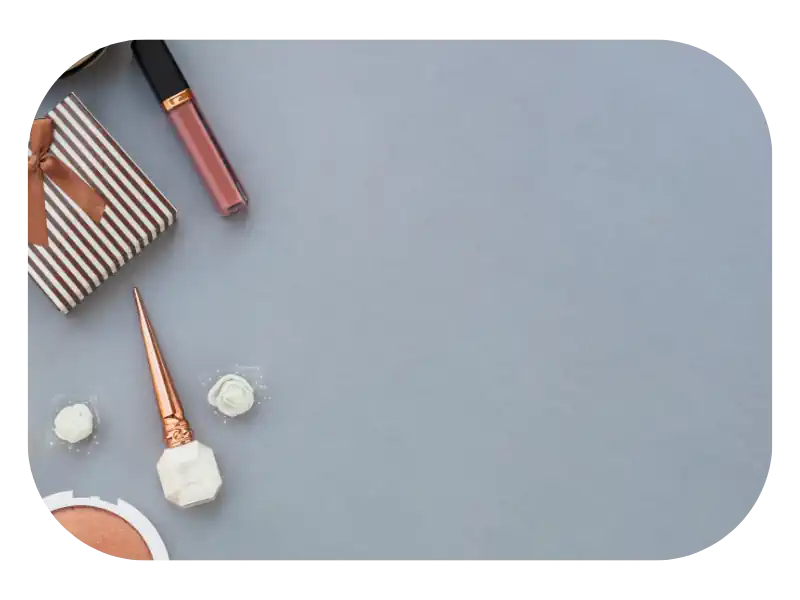
📸 Variety through negative space
These minimal, solid color focused shots can really help break up the look and feel of your Instagram and other social accounts. Even quick videos for TikTok done with this style inject variety. You can also use these to subtly add promotions. You can already see a tastefully written “15% off first facial” text in the middle of that gray up there…!
DIY photography artificial lighting
Don’t have a salon or medspa that gets great natural light? Want to take shots in the evening? Frustrated about lack of control over the sun itself?
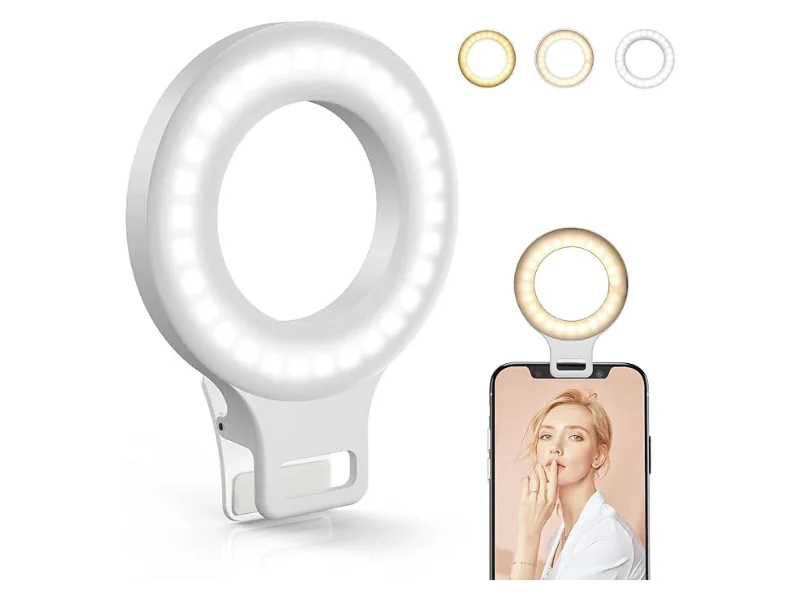
Don’t worry, there are plenty of ways to compensate. Let’s get into artificial lighting, starting with what has become an uber ubiquitous presence in photography: Ring Lights.
Ring Light Limitations
While convenient, ring lights often create very frontal lighting, which can wash out details and lack dimension.
If the subject is slightly too far from the ring light, it can cause unflattering shadows under the chin, nose, or in eye sockets.
Ring lights are primarily suited for headshots and directly overhead shots. It’s harder to achieve varied lighting angles.
Like any tool, it’s how you use them. Ring Lights are great for their portability, ease of use, and cost-effectiveness. However, their popularity works against our mission of making you stand out from the crowd.
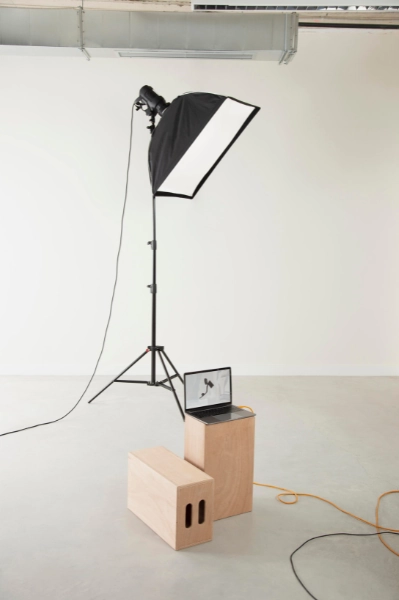
Single Softbox

Price Range: $70 - $100+
Recommended Brands: Neewer, RALENO, Emart.
Softboxes are a popular choice for salon photography, giving versatility and ability to create flattering, soft light. Here’s what you should be looking out for:
While professional kits can get expensive, there are plenty of budget-friendly options online. Starter kits typically range from $70-$100 USD and include the softbox, diffuser, and stand.
Consider the size – an 18″x24″ softbox is a good starting point for headshots and beauty product shots. You’ll also want to consider the kind of space you’ll be able to make in your own salon. Working with tight quarters might preclude you from being able to fully utilize a softbox.
Most softboxes come with a basic bulb. Ensure it’s a “daylight” bulb (around 5,500 Kelvin) for accurate color temperature. Replacement bulbs are readily available for a few dollars.
Why invest in a softbox?
Ideal for close-ups
The softbox material helps spread out the light source, minimizing harsh shadows and creating a flattering effect, especially on close-ups.
Control
Unlike desk lamps, the stand allows you to precisely position the light for various shots.
Budget-Friendly
Basic softbox kits are a long-term investment for consistent photo quality.
📸 Softbox Positioning Tip
A good starting point is slightly above your subject, angled downward at a 45-degree angle. This creates soft shadows and avoids a harsh look.
💡Equipment Tip: Phone Mount
Desk Lamps with Daylight Bulbs

Price Range: $5 - $100+
Recommended Brands: Ikea, Uplift.
The humble desk lamp can be a powerful piece of lighting equipment if you use it right. A far more space conscious choice than the softbox. Ideally, you’ll need two to create even light.
Look for adjustable lamps with flexible arms and goosenecks for precise positioning. Simple clamp-on lamps are even more versatile! Without adjustability, you’ll struggle to get the right look.
Just like with the softboxes, these are crucial for color. Like with softboxes, look for bulbs labeled “daylight” or with a color temperature around 5,500 Kelvin. These are widely available and inexpensive.
Place one lamp on either side of your subject for even light. Angle them slightly downward and experiment with moving them closer or further away to control the intensity.
Why use desklamps?
Flexible
With adjustable arms, you can tailor the lighting for various shots. Use them as sidelights, hair lights, or even to subtly illuminate a backdrop.
Inexpensive
If you already have desk lamps, you might only need to purchase daylight bulbs (which are inexpensive upgrades).
Beginner friendly
Teaches you basic lighting principles without needing specialized equipment.
🤔Desk Lamp Considerations
It may take more experimentation to find the perfect position, as compared to the more controlled light spread of a softbox. Desk lamps are inherently limited to beauty product shots and close-ups due to their lack of power.
DIY photography backdrops and setups
Background details matter. Having a non-distracting, clean environment in your beauty salon to set your model or product up against is just as important as the product or model. You might be able to rely on your salon space itself, improvise using colored fabrics or invest in a paper backdrop. Again, a lot depends on your resource in terms of space and cash!
Solid Color Fabrics - $

The quickest, easiest method to setting up a backdrop of your own. Sometimes all you need is a simple bedsheet or large piece of fabric for a versatile photography backdrop. For a clean and professional look, opt for neutral colors like white, black, gray, or even a soft pastel that aligns with your salon’s branding.
How to hang or set solid color fabrics
Curtain Rod or Dowel: Slide the fabric over a sturdy rod hung between two tall stands or mounted to a wall.
Wall Mounting: For a temporary backdrop, smooth the fabric against a wall, securing the top edge with tape or thumbtacks (choose a color that blends in!).
Notes on Fabric Choice
The larger the fabric, the more possibilities for different shot compositions.
Textured Walls - $
Price Range: $free- $50+
Does your salon boast rustic exposed brick, cool industrial elements, a wall with an interesting texture or patterned wallpaper? With the right lighting (as we explain above) you can use any of those as your own unique backdrop. Make it a main focal point of your salon branding!
The haves and have nots
💡Advanced Aperture Advice
For more dramatic photos, use a wide aperture setting on your phone’s camera to blur the background slightly, making the texture pop.
Paper Backdrops - $$
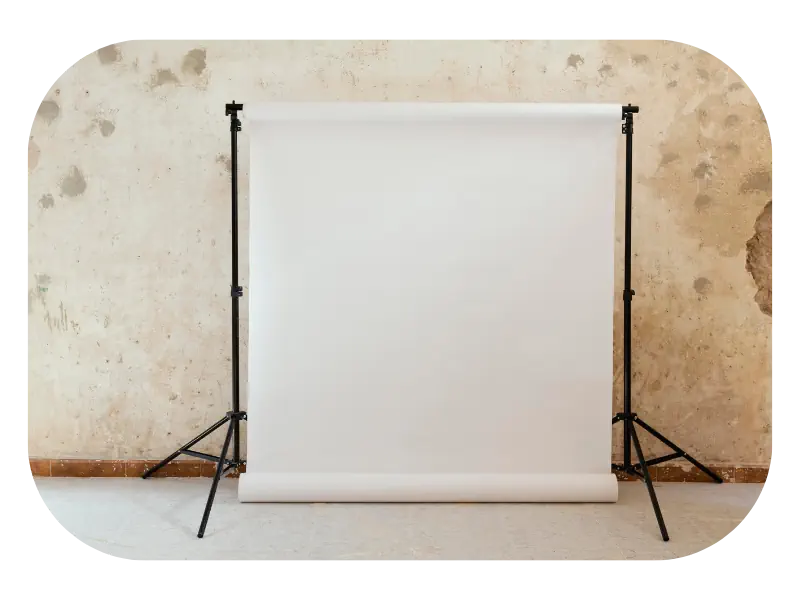
If you’ve ever been to a photography studio, this is the backdrop option you are most familiar with. These large rolls of paper come in a variety of colors, textures (smooth or matte) and sizes to accommodate different shooting styles.
Pros of Paper Backdrops
Variety: Wide range of colors to choose from, allowing you to experiment with different aesthetics.
Reflective Control: Available in matte finishes to minimize unwanted reflections.
Cons of Paper Backdrops
Not Just Paper: You’ll need to buy a stand at first too. There are purchasing options that combine both that are still fairly reasonable, ranging from $50 – $100+.
Limited Lifespan: Paper can wrinkle or tear over time, requiring replacements.
Not Reusable: Once a portion gets dirty or damaged, it can’t be easily salvaged.
📸 Storage & Space
Paper backdrops can be broken back down into portable zip-up bags that usually come with the backdrop stand. However, having the room to set them up in the first place is something you’ll need to scope out beforehand. If you are already working in tight quarters, you might consider the other backdrop solutions we’ve mentioned..
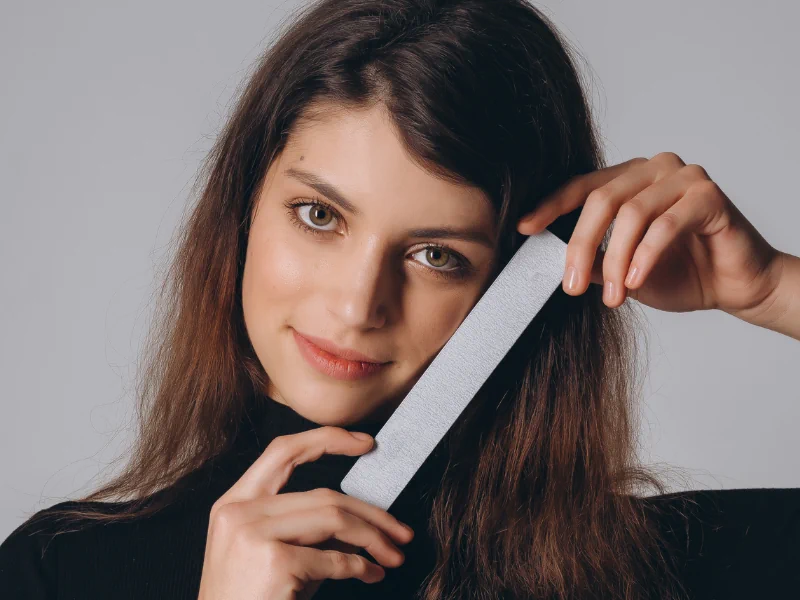
Staging & posing appealing salon photography
Beauty salon photoshoots aren’t just about the backdrop or lighting – how your subject feels in front of the camera has a huge impact on the results. Here’s how to help your clients (or even yourself for those selfies!) relax and look their best:
Build Confidence
Remind clients that this is about showcasing their transformation. Their excitement will shine through in photos.
What do I do with my hands?
Give Them Purpose: Awkward hands can make a whole image feel stiff. Suggest holding a relevant prop, gently touching their hair, or casually resting their hands on their lap.
Pockets Are Your Friend: For relaxed full-body shots, if their outfit allows, have them try placing one or both hands in pockets.
🤝The personal connection
When you are just starting out, having a colleague or friend be your model can help relax you both, keep things lively, and allow you to learn. Even if you are going from an austere, professional image, showing that fun, casual side to your salon can help draw in new clients.
Camera Angles
Find Their Best Side: Most people have a side they prefer. Ask them! Empowering clients with choices enhances the experience.
Hide Trouble Spots: Subtle changes in posture (turning a shoulder, tilting the chin) can minimize areas a client feels self-conscious about.

Leveraging Props
Tell a Story: The prop should relate to the service or product being showcased (brush for hairstyling, nail polish for a fresh manicure, etc.)
Complementary Colors: Consider how your prop’s color works in harmony with your chosen backdrop and overall brand aesthetic.
Enhance, Don’t Distract: The focus should remain on the beautiful work you’ve done. The prop is a supporting element.
Inexpensive phone photography accessories
The ecosystem of phone accessories is vast, meaning you’ve got all sorts of choice, and all sorts of good deals to avail of. A few small additions can really help make your salon photography life easier and more effective.
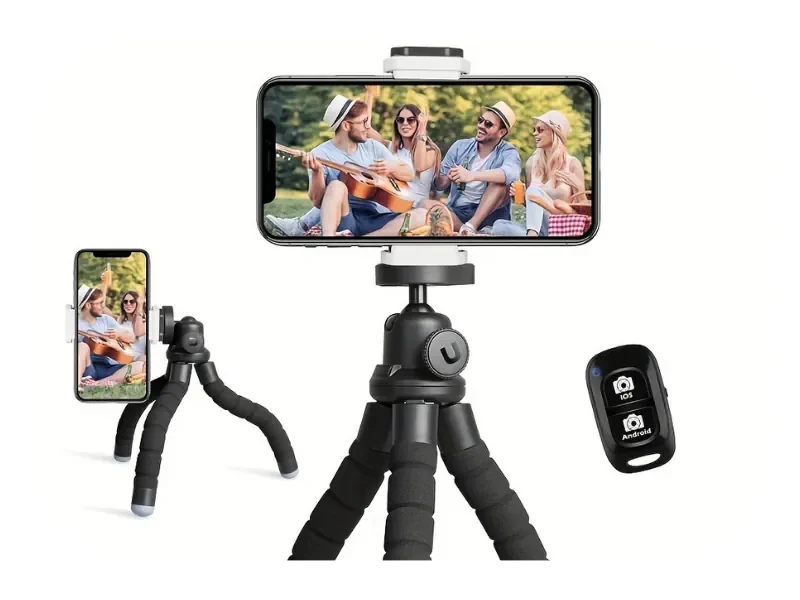
Tripods - nearly essential!
The humble tripod is a game-changer for salon photos. Even a basic, inexpensive one opens up possibilities and improves image quality tremendously. A tripod is the starting point for so much of what this guide talks about, we think it should be your first priority for a purchase.
No more blurry photos caused by shaky hands! This is especially crucial for close-ups and low-light situations.
Get high-angle shots for hair styling, position your phone low for unique perspectives, and capture photos from angles you can’t reach by hand.
Mini-Ring Lights (again)
A small difference in our earlier discussion about ring lights, these are ones directly mountable on your phone. This gives you great flexibility if you aren’t able to install other lighting setups in your beauty salon. Excellent for close-ups, you’ll still run into the issue of that ubiquitous harsh lighting ring lights can produce.
🖲️Bonus Idea: Remote Shutter Release
Salon photography key takeaways & conclusion
Quick, key takeaways for your DIY Salon Photography!
Mastering natural light is your foundation for great photos. Experiment to find the best spots in your salon at different times of day.
A clean, solid-colored fabric or textured wall offers a versatile and professional setting for everything from before/afters to product shots
Techniques like the rule of thirds and negative space elevate your photos from snapshots to visually engaging images.
Your phone is a capable camera! A tripod for stability, and occasional use of ring lights, open up a world of creative possibilities.
Basic adjustments to brightness, contrast, and color within easy-to-use editing apps will polish your photos and create a cohesive brand look.
The end of the guide, the start of your salon photography journey!
- We have another (smaller) guide on Photo Editing Apps that will help you process and post all these amazing shots!
- We also have an equally info packed, comprehensive marketing guide for Med Spas!
- Want an online focused marketing roadmap? We’ve got that too.
As a marketing professional, I really believe in the power of original photography for branding and promoting your beauty salon or medical spa. Stock is everywhere, and with AI on the horizon, being able to show off real people, real treatments, real transformations is going to stand out. New clients are likely to find you online first. Giving them the best possible first impression of what a visit to your salon is going to be like versus trying a competitor will really make a difference. If you are starting out your journey with salon photography, definitely tag us on Instagram with your latest creations! It’d be awesome to see these tips put into practice.
Make salon management simple